

I. Video Tutorial: Please click full screen
(Important Note: On the CNAME setup in the video:
If you are a Agency user setup this for your login domain in Boost custom domains settings, you can choose any subdomain name you want. The default settings is ‘login.yourdomain.com’.)
Select CNAME again, then add ‘subdomain’ and boost.link for domain name.
II. Written Tutorial:
- Go to www.cloudflare.com
Login or Signup if you don’t have account.

- Add your domain here
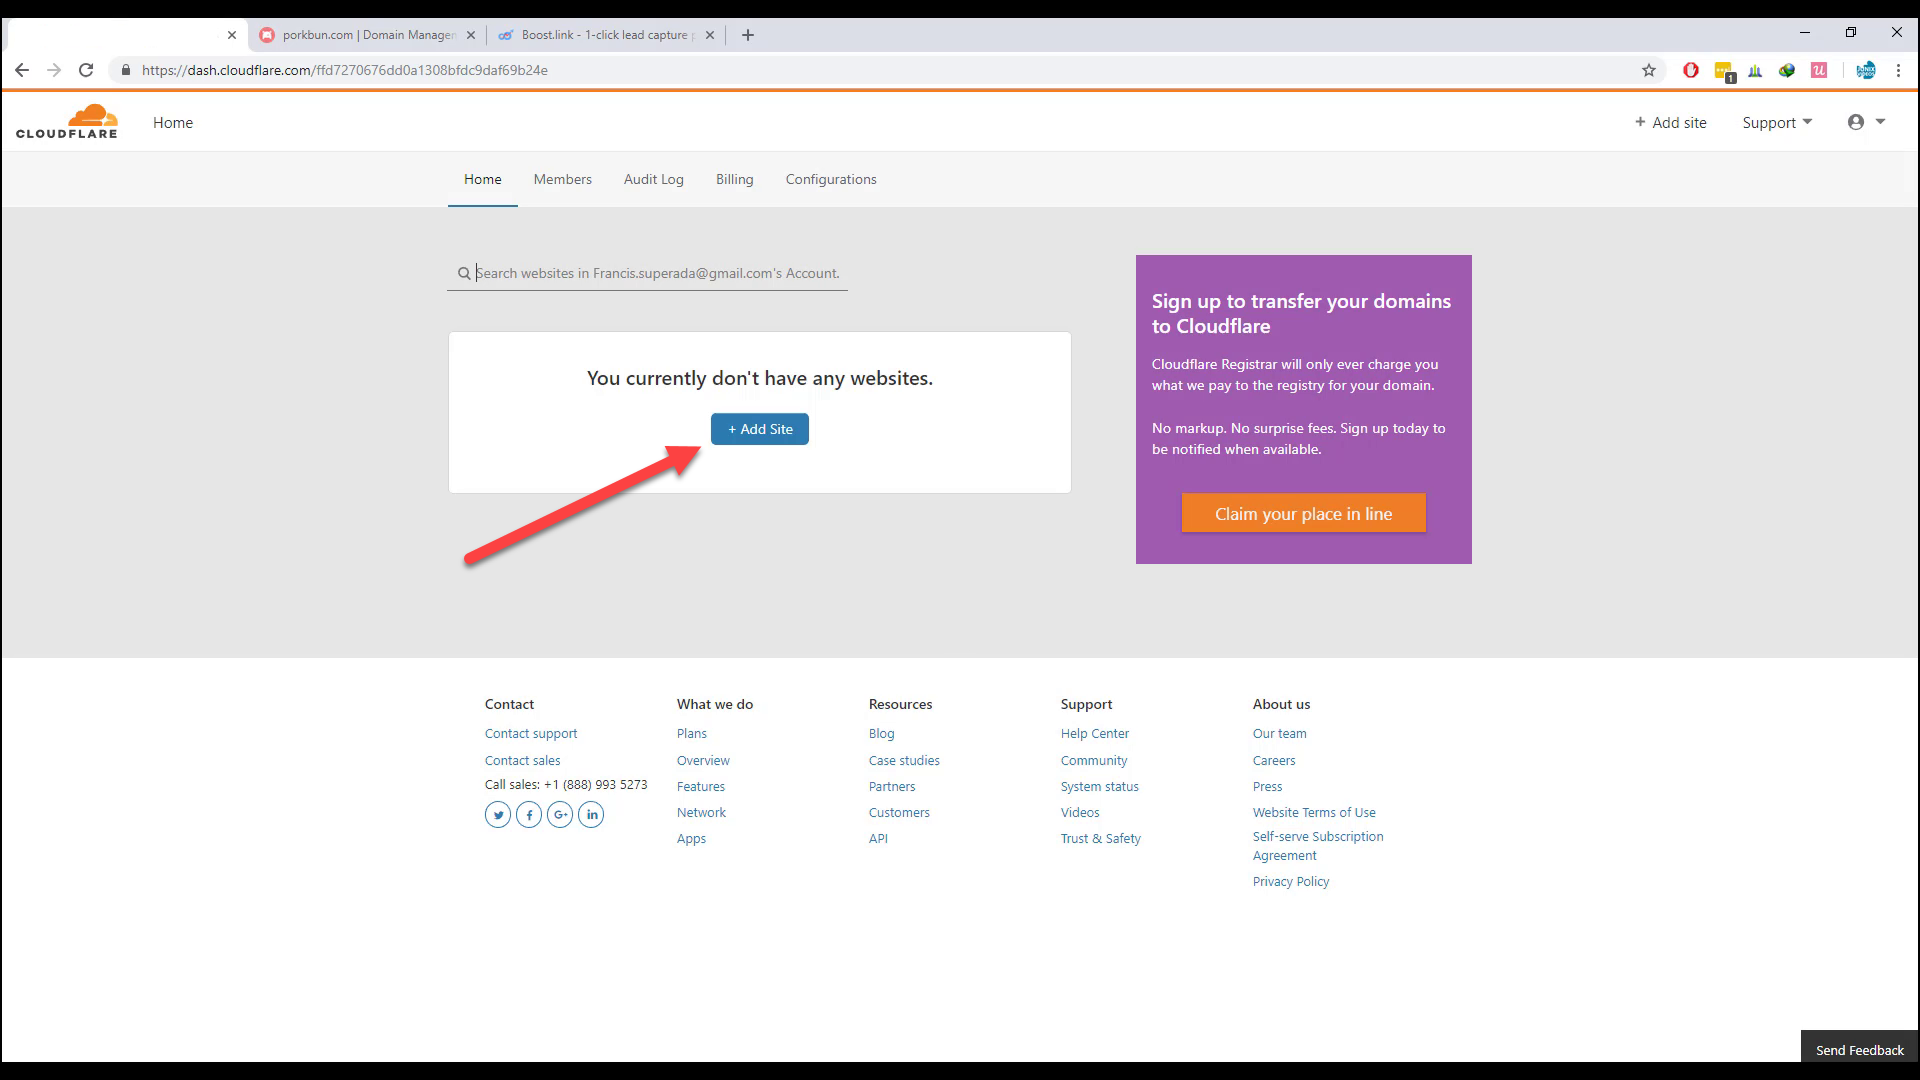

- Click Next

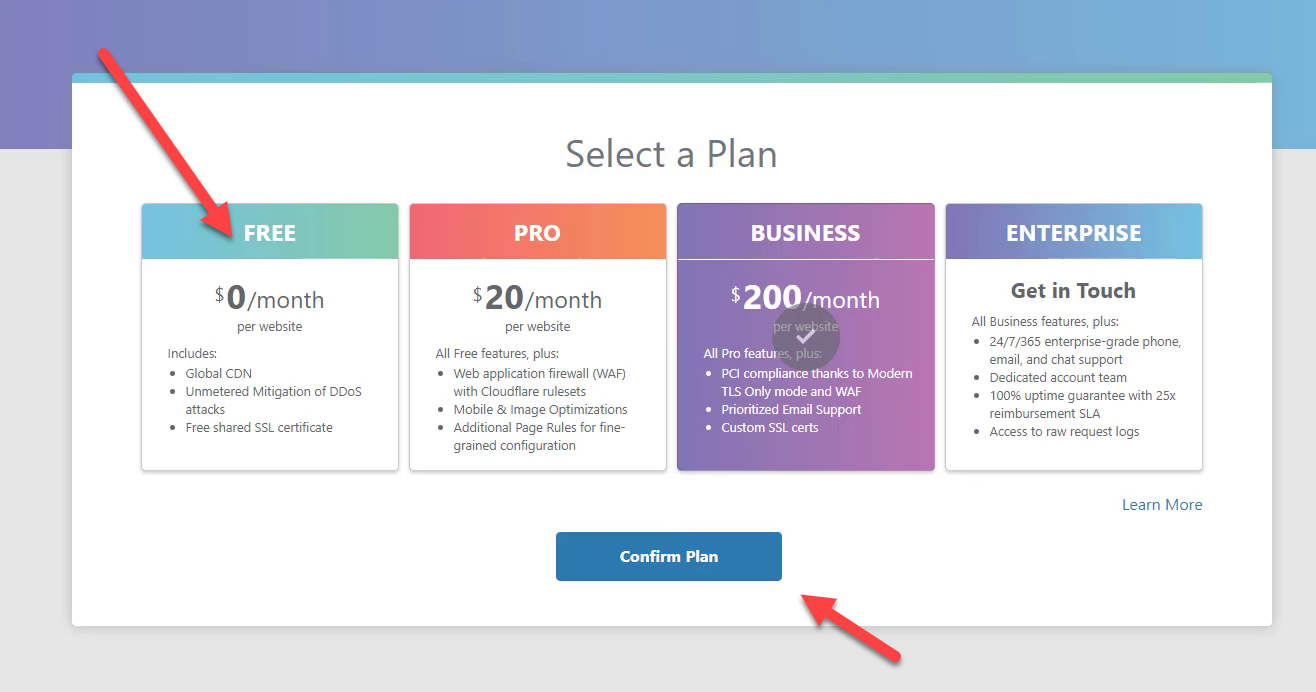
- Select FREE Plan and confirm

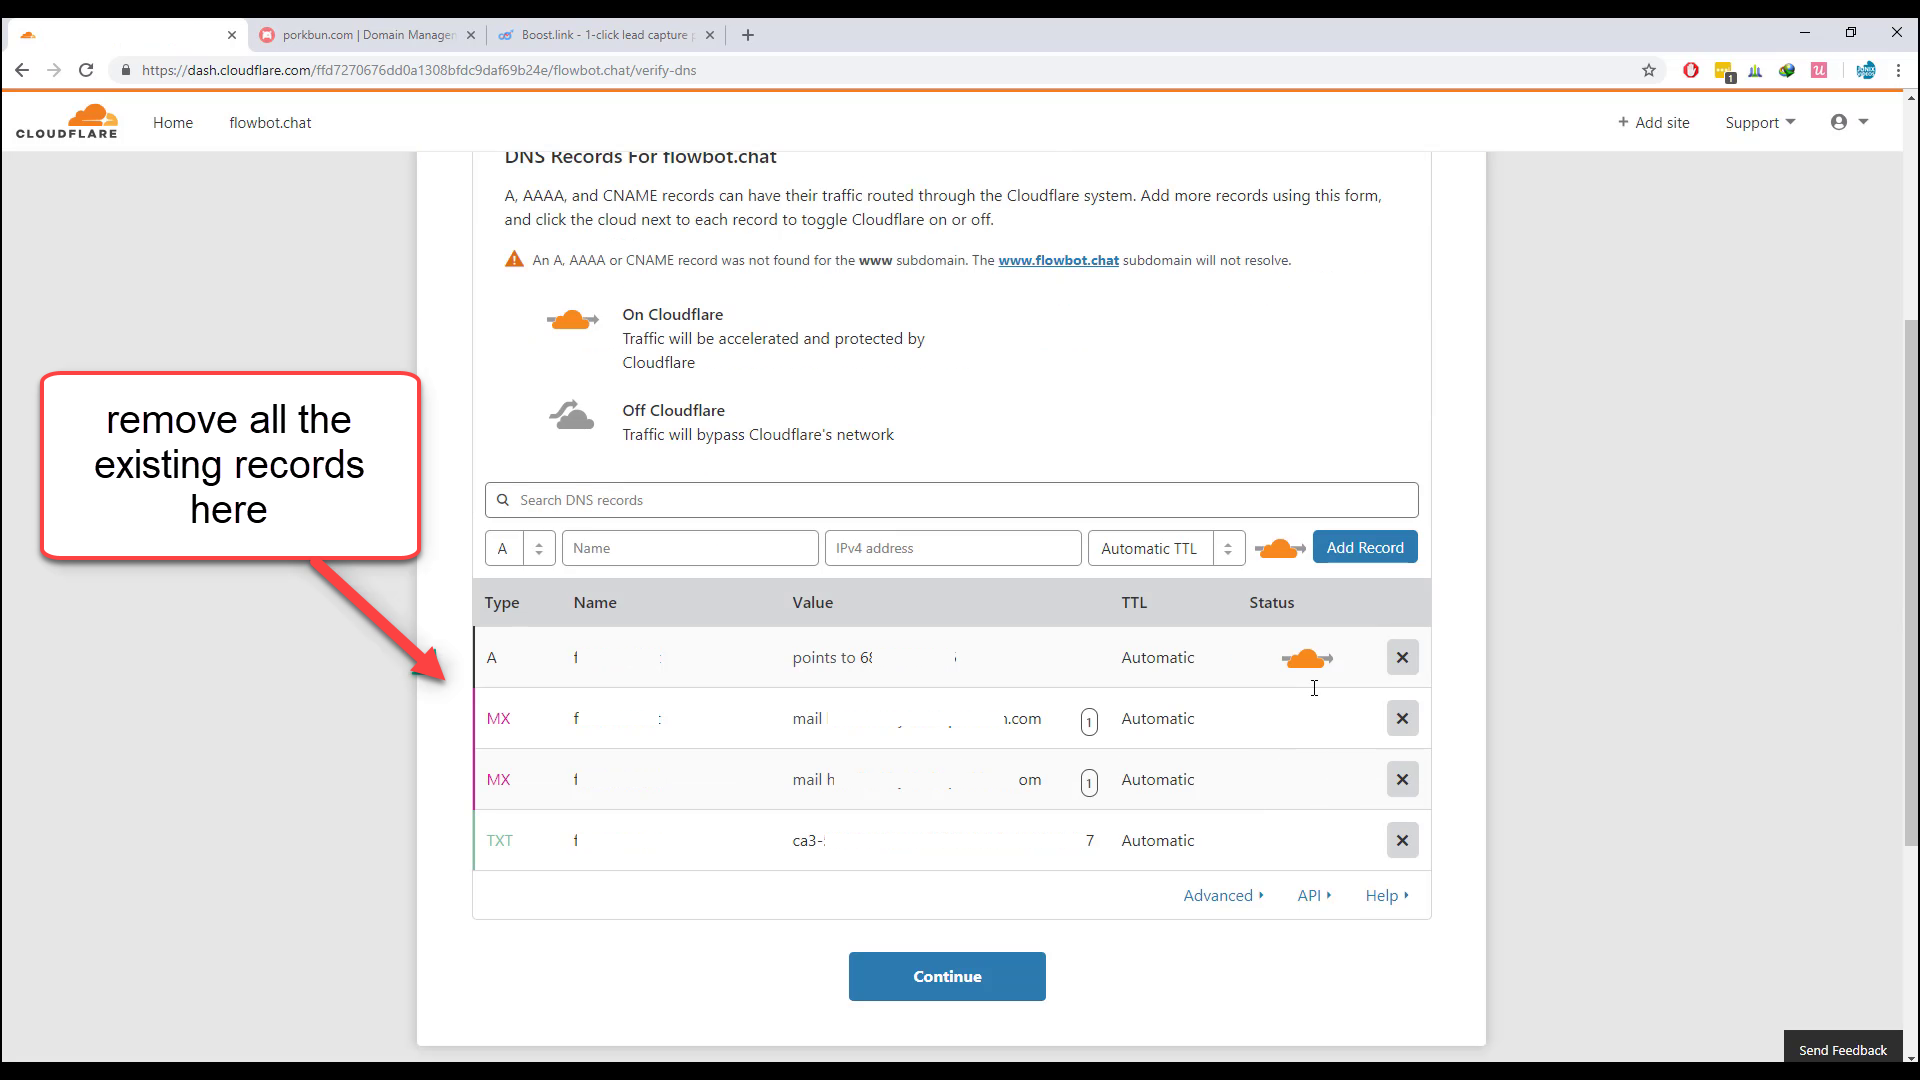
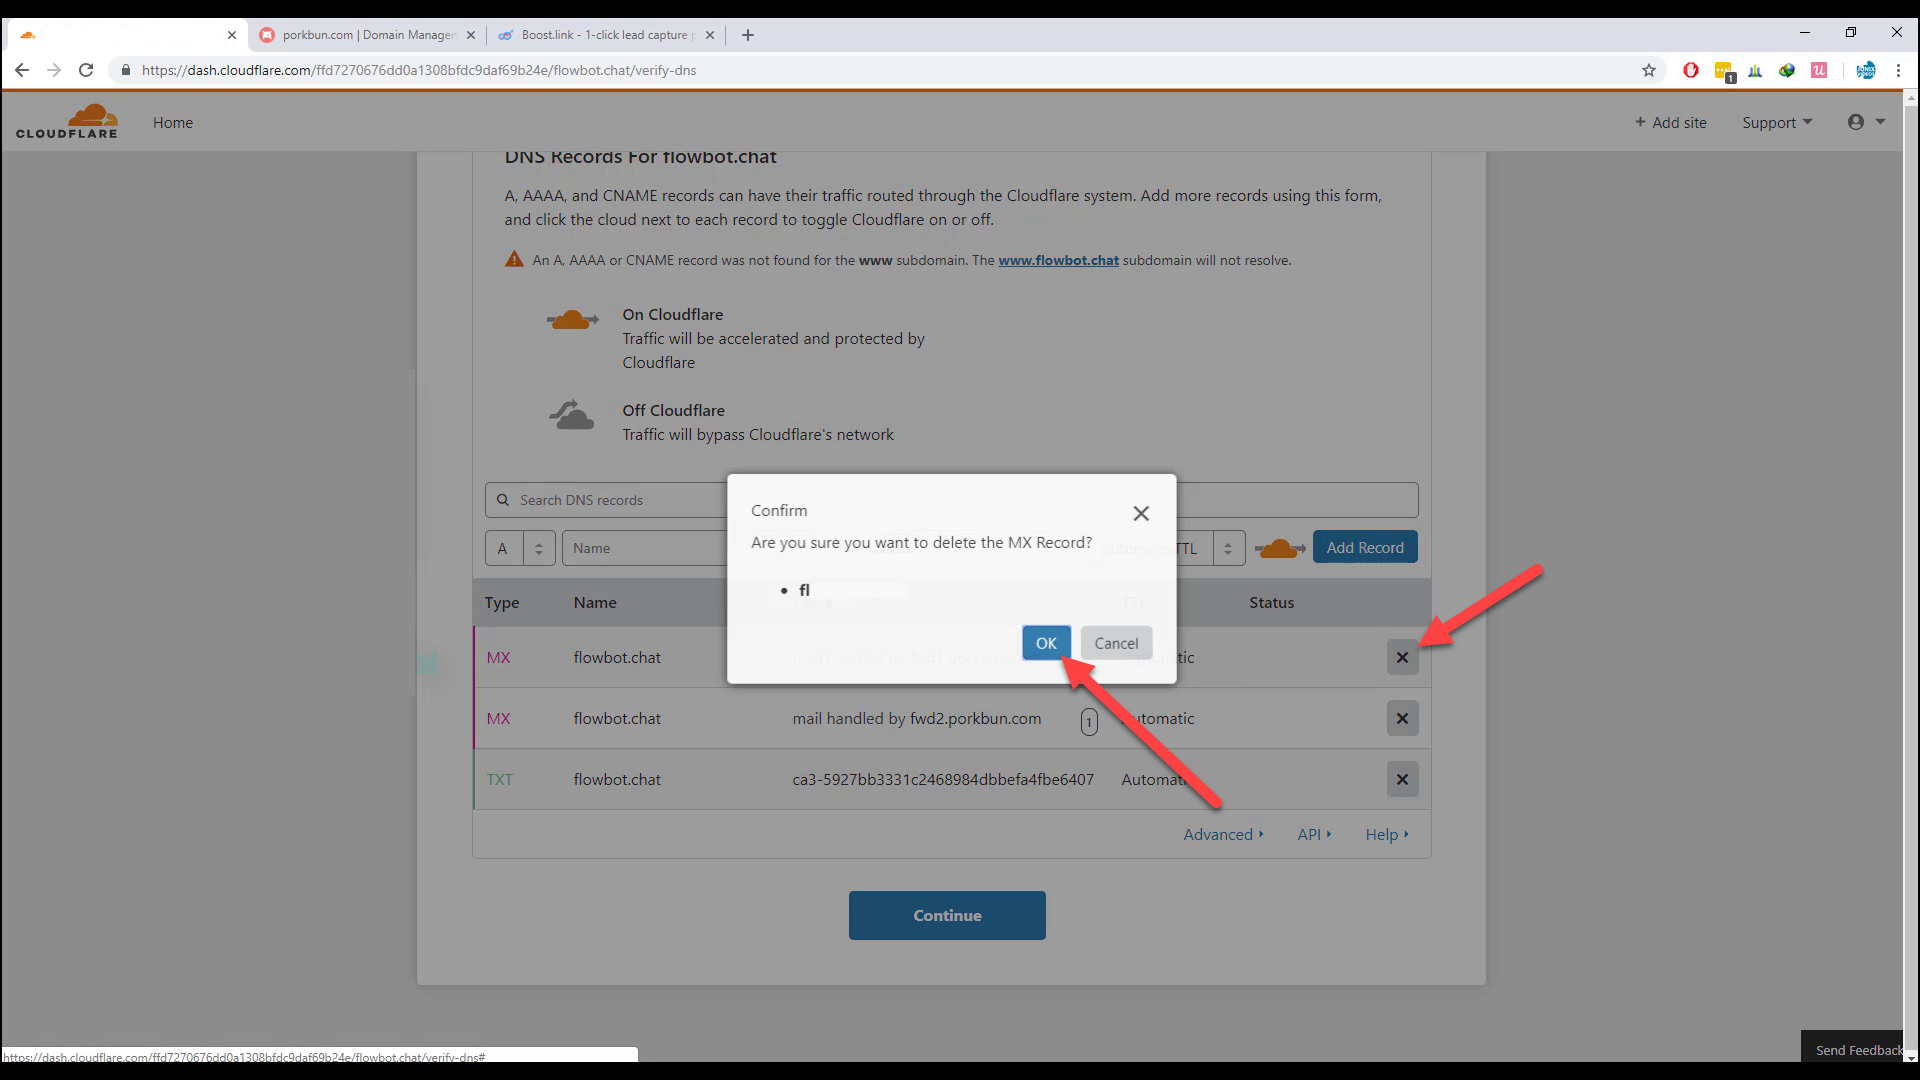
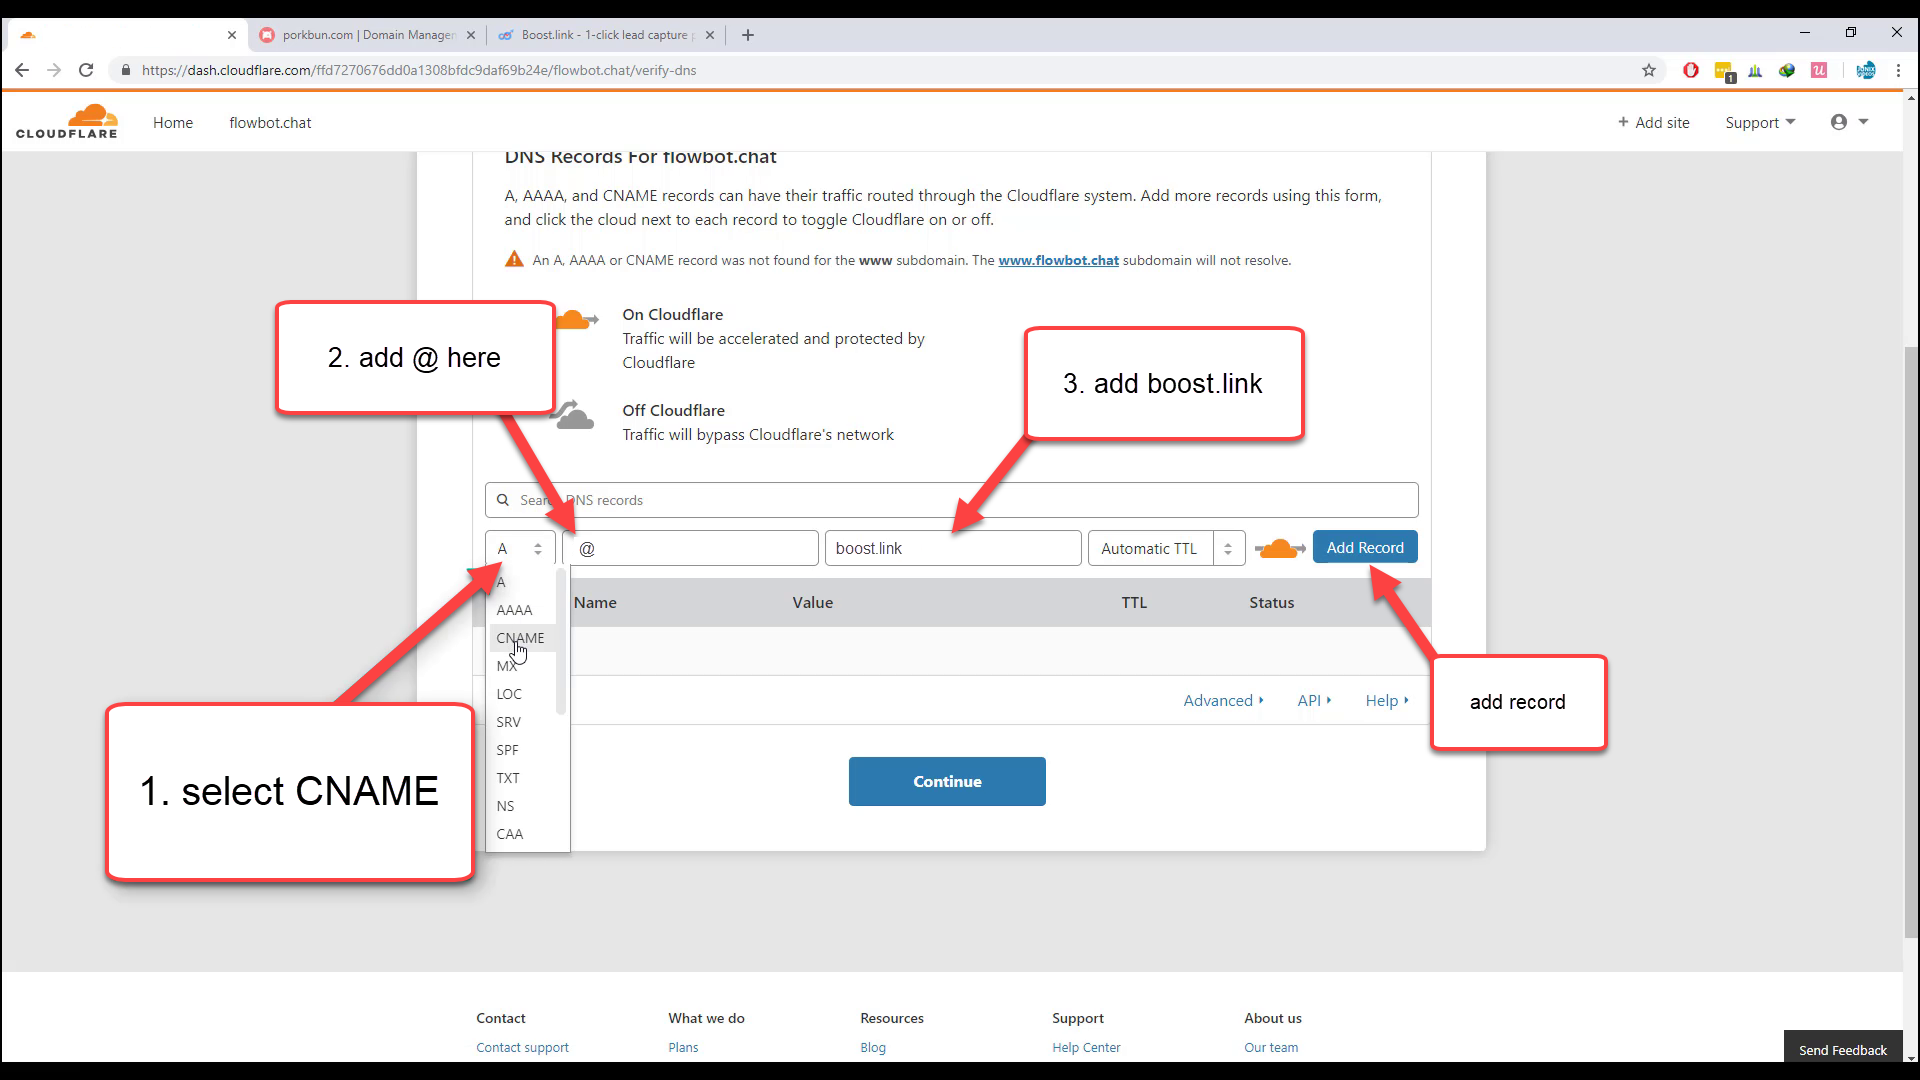
- Then remove all existing records here

- Now select CNAME first then add @ in the name field and add boost.link in address field. Then click Add record.
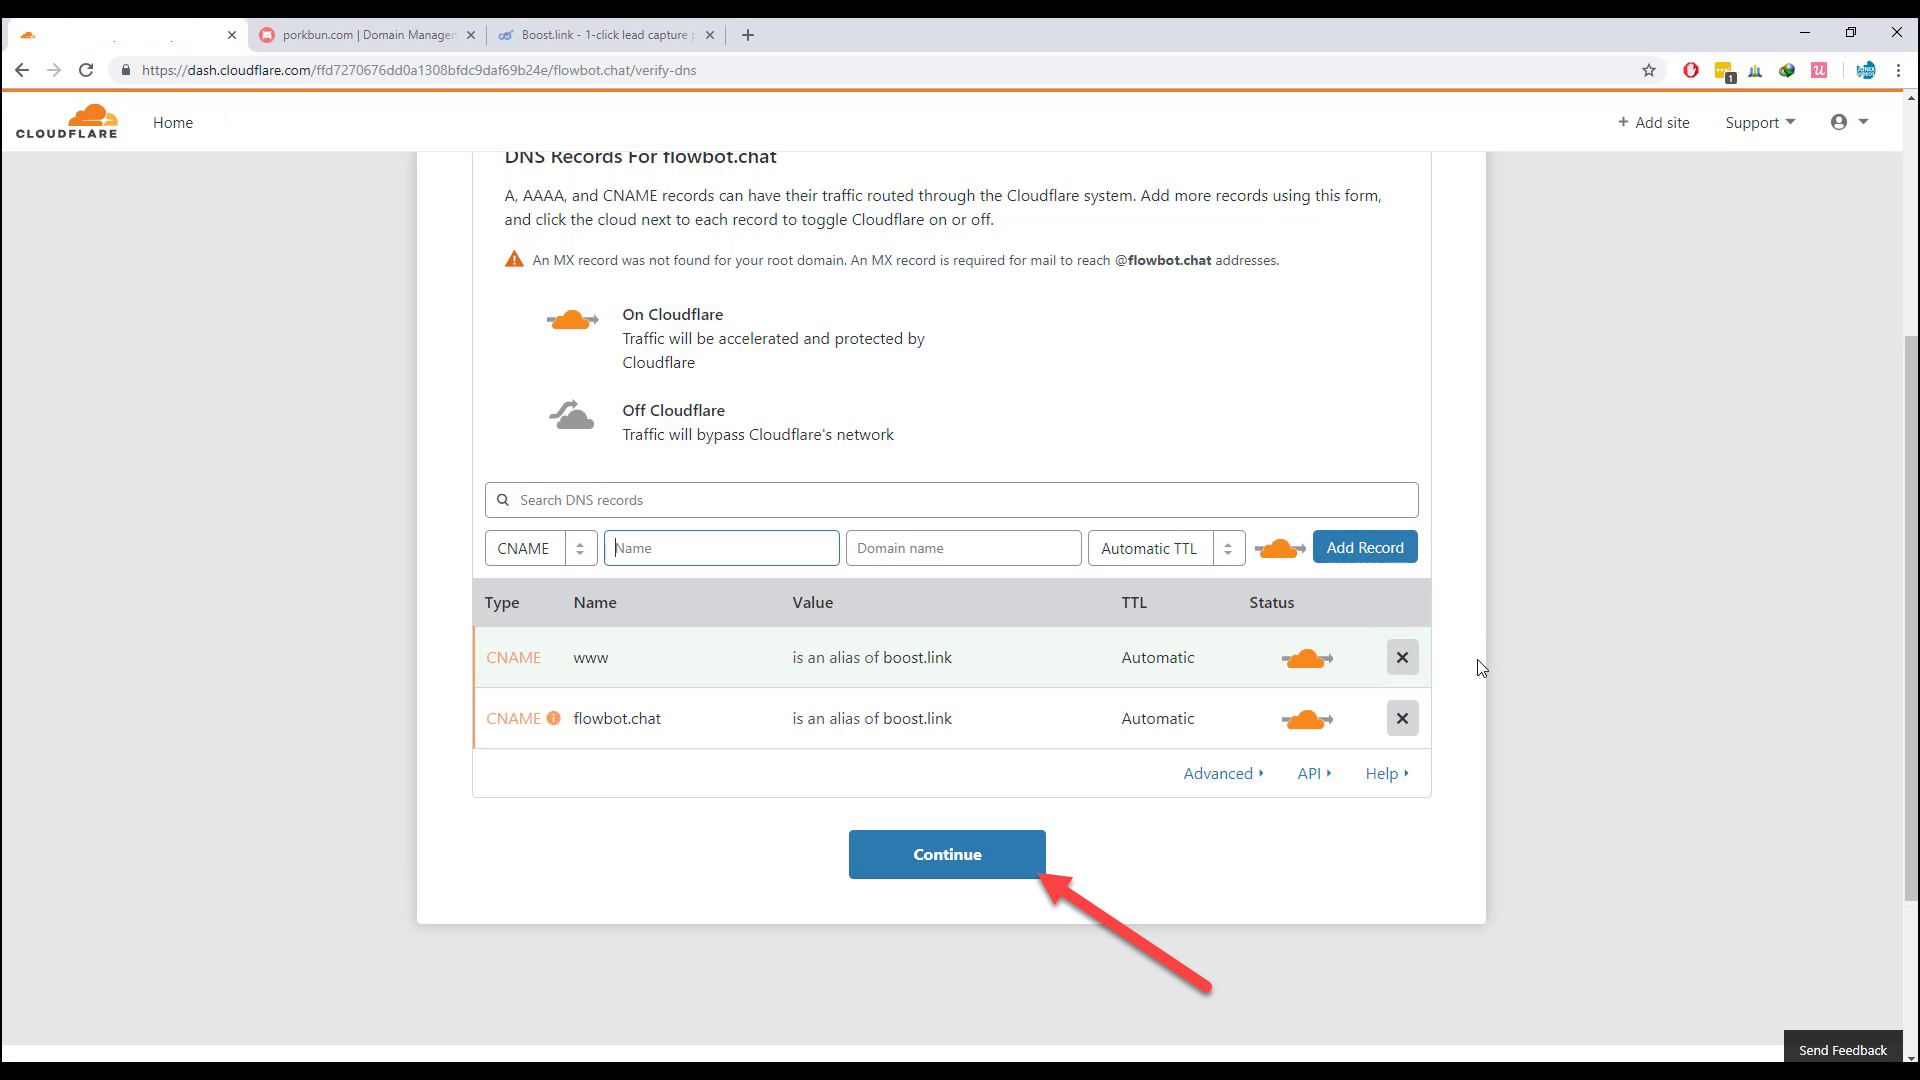
next,select CNAME again then add WWW in name field and boost.link in address field.
 (Note: If you are a Agency user setup this for your login domain in Boost custom domains settings, you can choose any subdomain name you want. The default settings is ‘login.yourdomain.com’.)
Select CNAME again, then add ‘subdomain’ and boost.link for domain name. then Continue.
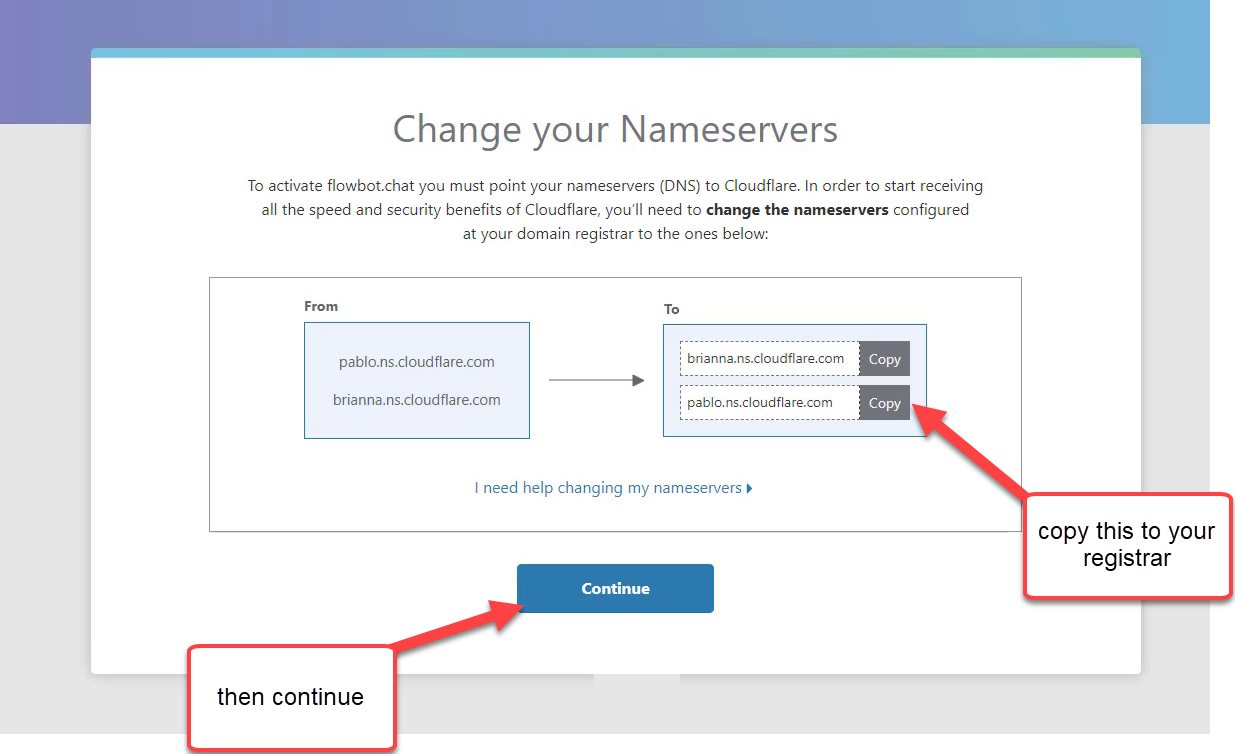
- Copy the nameservers in your Registrar. and then Continue.
- Go to your Registrar and look for your Nameservers Settings.

- Remove all the existing nameservers here and paste the copied nameservers from Cloudflare.

and click Submit. - Click the Recheck nameservers.
 and you’ll see the Status of your domain here:

then go to Crypto. - make sure that Flexible is selected here.

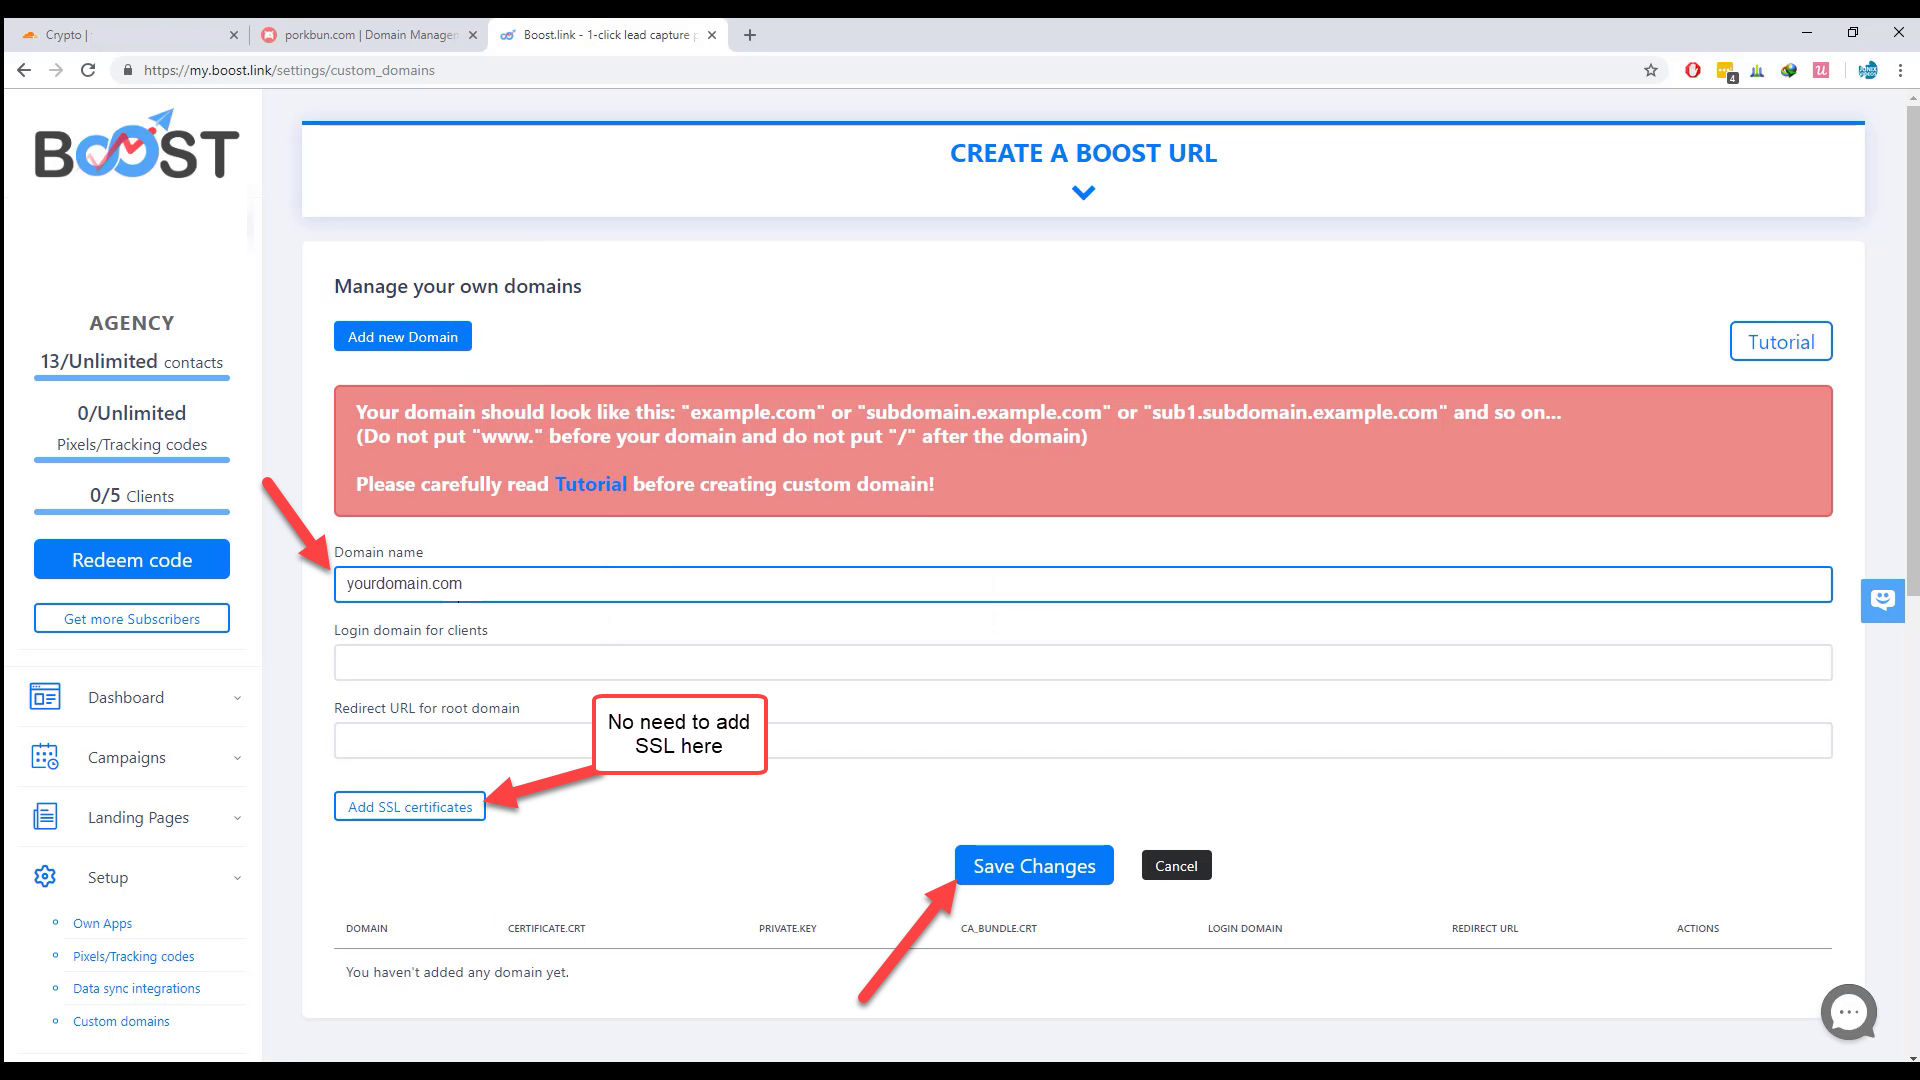
- Now go to your Boost and add your custom domain.
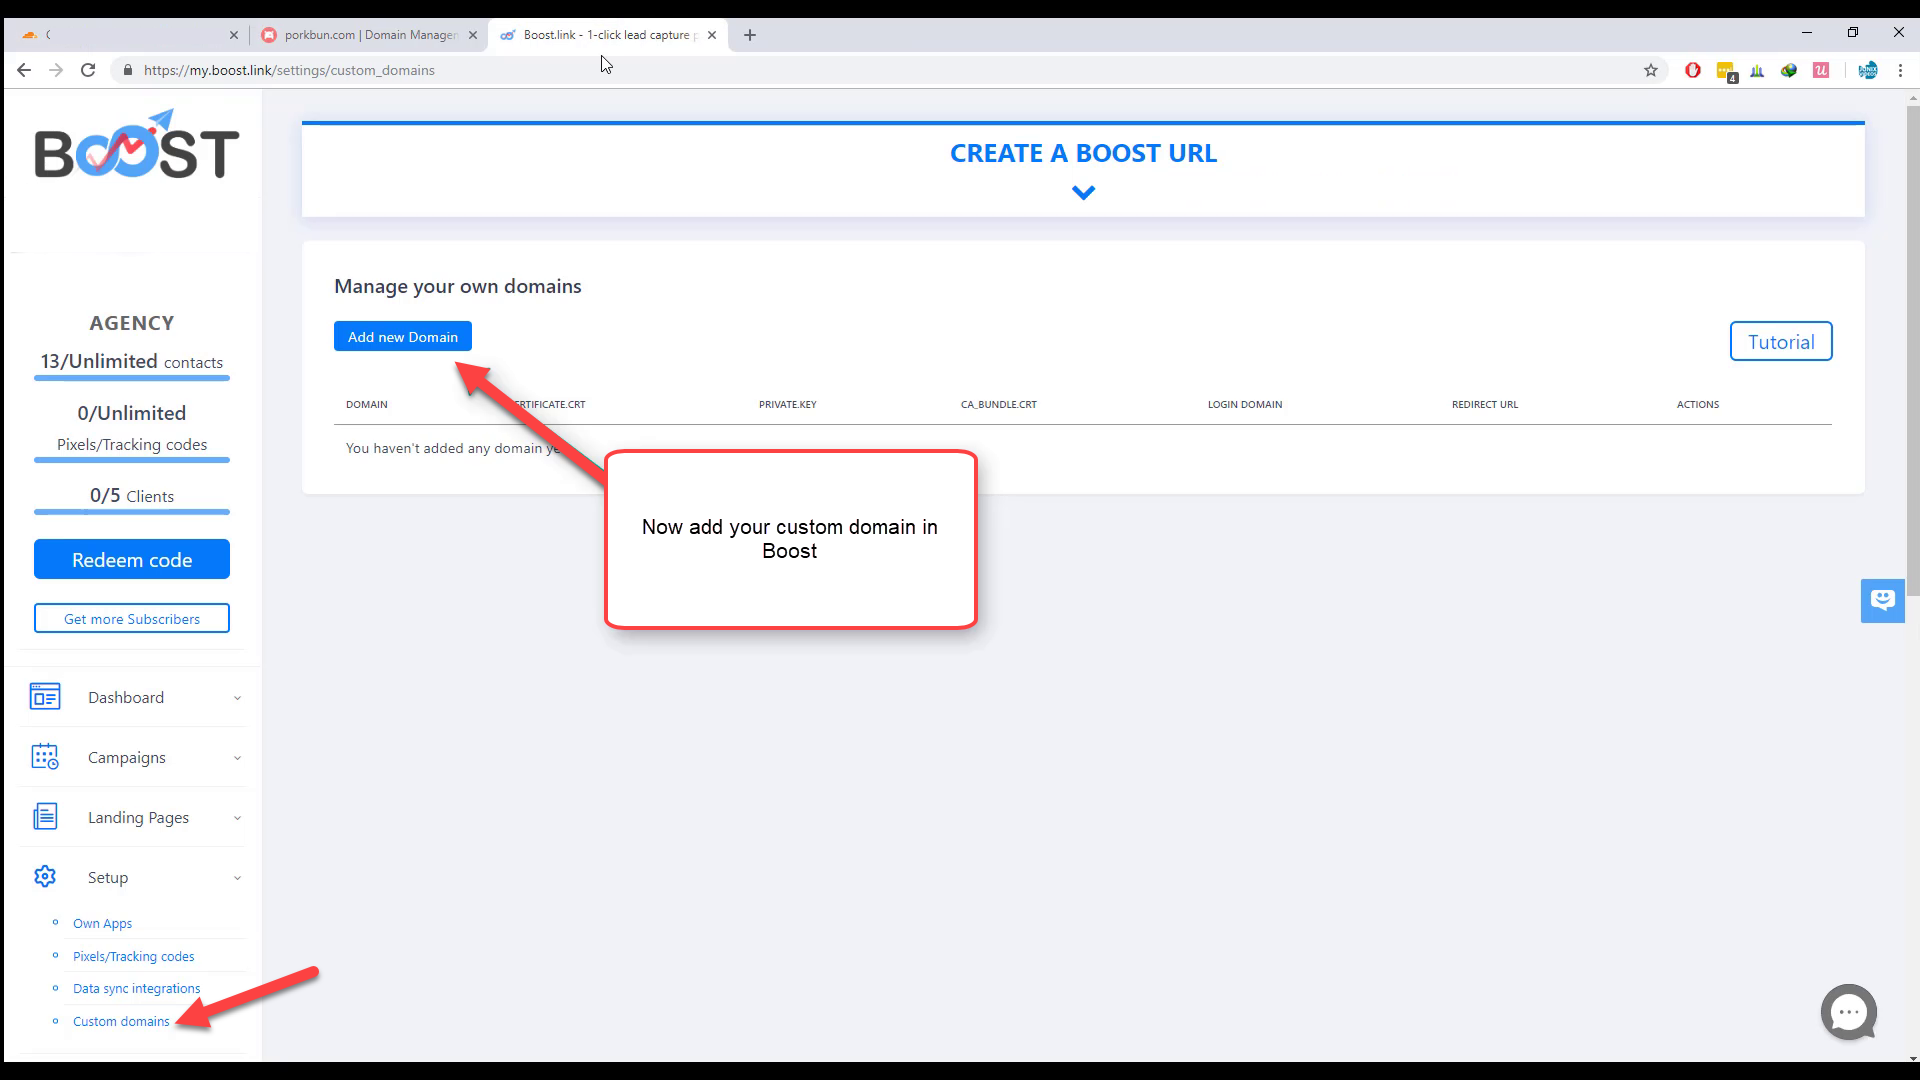
- add your domain in Domain name field. No need to add SSL certificates.
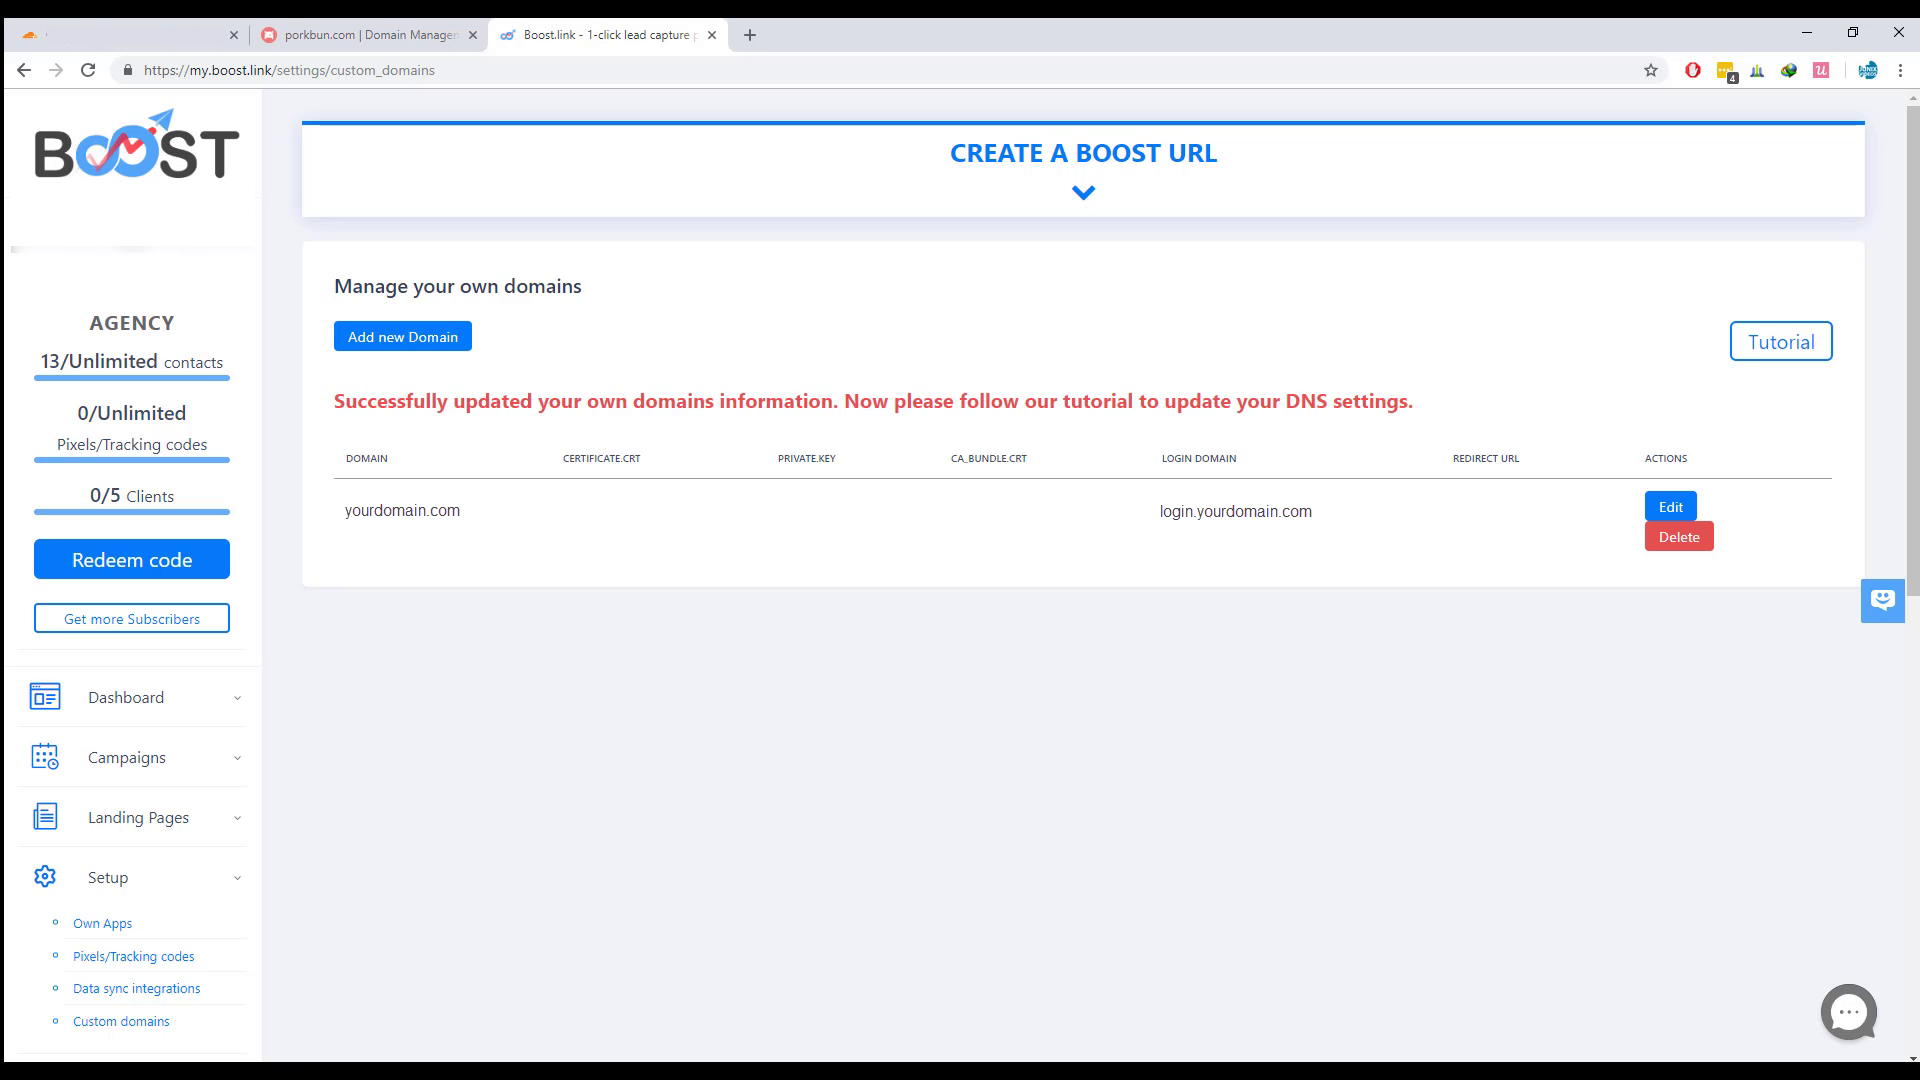
then Click Save changes.
- and your Done.
This tutorial is not well done for us who are using a subdomain with cloudflare. Can you update it?
Hi,
Subdomain would follow a similar process.